
Main Courses
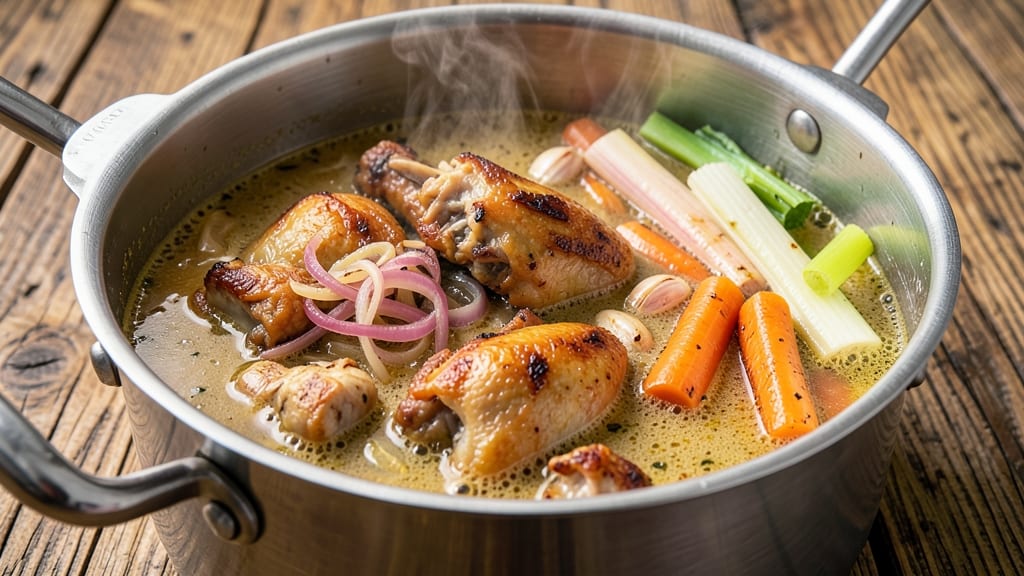
Chicken feet stock recipe unlocks the secret to restaurant-quality depth in soups and stews, transforming humble ingredients into a rich, umami-packed foundation. This traditional technique—rooted in Asian cuisine—harnesses the collagen and gelatin from chicken feet to create a velvety, flavorful stock that elevates any dish.
The process requires patience, but the results are unmatched: a deep, savory broth perfect for braising, soups, or even ramen.
What sets this stock apart is its ability to deliver complex flavor with minimal effort after the initial preparation. Chicken feet must be thoroughly cleaned and blanched to remove impurities before simmering for hours, extracting their gelatinous richness.
The key lies in low-and-slow cooking—never rushing the process, as this is what transforms tough connective tissue into a silky, luxurious broth. This method builds layers of umami that store-bought stocks simply can’t replicate.
By the time you strain the finished stock, you’ll have a golden, aromatic liquid that’s far more than just a base—it’s the soul of your dish. The stock’s natural richness reduces beautifully, intensifying its depth, while its gelatin content gives soups and stews that signature silky texture.
Whether you’re making pho, braising meats, or enriching sauces, this stock will take your cooking to the next level.
For best results, store the stock in the refrigerator for up to a week or freeze it in ice cube trays for longer shelf life. The versatility of this stock makes it a professional kitchen staple, and once you try it, you’ll never return to basic chicken broth again.
Let’s get started on creating this flavor powerhouse.
Ingredients for chicken feet stock
Fourteen humble ingredients transform into a restaurant-quality umami powerhouse for soups and stews.
| Ingredient | Amount | Notes |
|---|---|---|
| Chicken Feet 🦶 | 2 ½ lb | Fresh, cleaned and blanched |
| Yellow Onions 🧅 | 2 whole | Quartered, skin on |
| Carrots 🥕 | 4 whole | Scrubbed, cut into chunks |
| Fresh Ginger Root 🌿 | 2 oz | Peeled, sliced into coins |
| Garlic Cloves 🧄 | 8 cloves | Smashed, not minced |
| Celery Stalks 🌿 | 4 whole | Cut into 2-inch pieces |
| Dried Bay Leaves 🍃 | 2 whole | High-quality, aromatic |
| Black Peppercorns 🌶️ | 1 tbsp | Crushed, not ground |
| Salt 🧂 | 1 tbsp | Kosher or sea salt |
| White Wine Vinegar 🍷 | ½ cup | For blanching chicken feet |
| Cold Water 💧 | 12 cups | For initial blanching |
| Fresh Water 💧 | 8 cups | For final simmering |
The chicken feet are the heart of this stock—look for plump, clean ones at Asian markets or specialty butchers. Costco often carries them frozen, which works perfectly. If you're nervous about cleaning them, soak in cold water with vinegar for 30 minutes first. The ginger and garlic are non-negotiable for that deep aromatic base—fresh is best here. For the vegetables, organic is ideal since you're not peeling them, but regular works too. Bay leaves should be fragrant, not brittle, and peppercorns should be whole for better flavor infusion.
No fresh ginger? Powdered works at half the amount, but it lacks that same punch. Substituting chicken feet with regular chicken bones? You'll miss that signature gelatinous richness—stick with feet for authentic texture. Short on carrots? Sweet potatoes or parsnips keep the sweetness balanced. The vinegar is crucial for blanching—white wine vinegar is ideal, but apple cider works in a pinch. If you're making a big batch, double the water and simmer time proportionally. The stock reduces beautifully, so don't worry about starting with extra liquid.
This stock keeps for 1 week refrigerated or 3 months frozen—freeze in ice cube trays for perfect portions. The flavor actually improves after 24 hours as the gelatin sets. For restaurant-quality results, reduce the stock by half before using in sauces. I always make a double batch—one for immediate use, one to freeze for future braising projects. The first batch will always be the richest, so use that one first when thawing.
Why You'll Love This Recipe
- Minimal Chopping Needed: The onions and carrots barely take five minutes to prep—just rough chop, no fancy dicing. Between us, the ginger and garlic are the real stars here, and you can grate or smash them in under a minute.
- Umami Bomb: That crispy, caramelized chicken feet? Pure flavor gold. The ginger and garlic deepen into something rich and savory—like a hug for your taste buds, but better than actual hugs (no judgment).
- Stockpile Savings: A single batch lasts me weeks in the fridge, and I freeze it in ice cube trays for easy portions. Honestly, it’s my go-to for soups, stir-fries, or even instant ramen upgrades—no waste, all flavor.
- Budget Booster: Chicken feet are dirt cheap, and this stock costs pennies per serving. I’ll be real: my grocery bill drops when I make this instead of buying store-bought broth. Plus, the leftovers keep giving.
Step-by-step instructions for chicken feet stock
This method transforms humble chicken feet into a velvety, umami-rich stock perfect for elevating any soup or stew.
Blanch the Chicken Feet to Remove Impurities
Place the 2.5 lb chicken feet in a large stockpot and cover completely with the 12 cups cold water. Add the 0.5 cup white wine vinegar—this helps draw out impurities and brightens the final flavor. Bring to a gentle boil over medium-high heat, then immediately reduce to a simmer for 15 minutes. You'll see foam rise to the surface; skim this off with a ladle as it forms.
After 15 minutes, drain the chicken feet and rinse them thoroughly under cold water. This critical step removes any remaining blood or surface impurities that could make your stock cloudy. Return the cleaned feet to the same pot for the next phase. The blanching ensures your stock starts with a clean, pure foundation.
Build the Aromatic Base with Vegetables and Spices
In the same pot, add the 2 whole yellow onions (quartered), 4 whole carrots (cut into chunks), 2 oz fresh ginger root (sliced into coins), 8 cloves garlic cloves (smashed), and 4 whole celery stalks (cut into 2-inch pieces). These vegetables form the flavor backbone of your stock. Add the 2 whole dried bay leaves, 1 tbsp crushed black peppercorns, and 1 tbsp salt to deepen the complexity.
Cover the vegetables with 8 cups fresh water, ensuring all ingredients are submerged. Bring to a boil over medium-high heat, then reduce to a gentle simmer. You'll notice the vegetables release their natural oils and aromas—this is where the magic happens. Let it simmer uncovered for 30 minutes, stirring occasionally to prevent sticking. The longer you simmer, the more flavor you extract, but avoid boiling vigorously, which can make the stock cloudy.
Simmer the Chicken Feet for Maximum Flavor Extraction
Add the blanched chicken feet back to the pot, ensuring they're fully submerged. Return the liquid to a gentle simmer over low heat—this is the longest step, but patience is key. Cover the pot and let it cook for 3 to 4 hours, maintaining a low simmer. You'll know it's working when the chicken feet begin to break down and the liquid takes on a deep amber hue.
After 3 hours, check the stock's consistency. It should be rich and slightly gelatinous, with the chicken feet falling apart easily. If the liquid hasn't reduced enough, continue simmering for another 30 minutes. The goal is a concentrated, flavorful stock that coats the back of a spoon. Avoid boiling, as this can cause the stock to become cloudy or bitter.
Strain and Finish the Stock
Once the chicken feet are fully broken down and the stock has simmered for 3 to 4 hours, remove the pot from heat. Strain the stock through a fine-mesh sieve or cheesecloth into a clean bowl or pitcher. Press gently on the solids to extract every last drop of flavor—this ensures you capture all the umami richness. Discard the solids or compost them.
Taste the stock and adjust the seasoning if needed. You might find it needs a touch more salt or a splash of white wine vinegar to brighten the acidity. Let the stock cool to room temperature, then transfer it to airtight containers. It will keep in the refrigerator for up to 5 days or freeze for up to 3 months. This stock is the secret weapon behind restaurant-quality soups and stews—deep, complex, and utterly irresistible.
Pro Tips For Making Chicken Feet Stock
- Blister the Feet First: Toss the chicken feet in a dry pot over medium-high heat for 5-7 minutes before adding liquid—this cracks the skin and forces out collagen-rich gelatin. I learned this the hard way after making stock that tasted more like chicken feet than rich broth.
- Peel That Ginger: Skip the peeling—just scrub the ginger root under cold water and slice it thick (½-inch chunks). The skin adds subtle bitterness and extra depth, and it saves you 2 minutes of scrubbing. (Yes, even if you’re impatient like me.)
- Don’t Rush the Simmer: Let the stock come to a gentle simmer, not a rolling boil—anything hotter turns the broth cloudy and wastes flavor. Cover the pot and keep it at 180-190°F (just small bubbles breaking the surface) for at least 4 hours. Trust me, the patience pays off.
- Strain Twice: After simmering, strain the stock through a fine-mesh sieve, then a cheesecloth-lined colander for a crystal-clear finish. The extra step removes grit and makes the stock look (and taste) restaurant-quality. It’s not the prettiest method, but it’s the tastiest.
Common mistakes when making perfect results
Skipping the Blanching
Skipping the blanching step is one of the most common mistakes—and it can ruin your stock. The 15-minute vinegar bath removes blood, dirt, and impurities that would otherwise make your broth cloudy or bitter.
I’ve seen home cooks rush this step, thinking it’s optional, but trust me: blanching is non-negotiable. If you’re short on time, at least soak the feet in cold water with vinegar for 30 minutes before proceeding. 🦶
Boiling Too Vigorous
Once you start simmering, resist the urge to crank the heat up. Boiling vigorously breaks down the collagen in chicken feet too quickly, resulting in a thin, watery stock instead of a rich, gelatinous one.
Keep the heat at a gentle simmer—you should see small bubbles at the edges, not a rolling boil. I’ve had batches turn out cloudy because I got impatient and let it boil. The key is low and slow for those 3-4 hours.
Under-Simmering the Feet
Chicken feet need time to release their gelatin and umami. If you cut the simmer short (under 3 hours), you’ll miss out on that signature silky texture and depth of flavor. I’ve tested this by pulling stock at 2 hours—it’s still drinkable but lacks that restaurant-quality richness.
The feet should be falling apart by the end, and the stock should coat the back of a spoon. Patience here makes all the difference. ⏱️
Not Skimming the Foam
During the initial blanching, that foam rising to the surface isn’t just bubbles—it’s impurities, fat, and proteins that can make your stock cloudy or off-flavor. Skim it off with a ladle every 5 minutes during the first 15 minutes of blanching.
I’ve made stock where I forgot this step, and the result was a murky, slightly bitter broth. A clean start means a clean finish. 🧼
Overcrowding the Pot
If your pot is too small, the chicken feet won’t be fully submerged, and the vegetables will scorch. Use a pot that’s at least 8-quart capacity for this recipe—this ensures everything stays covered and simmers evenly.
I once used a 6-quart pot and ended up with burnt onions and undercooked feet. The stock should have enough liquid to cover all ingredients by 1 inch at minimum. 🔥
Ignoring the Straining Step
Pressing the solids after straining extracts every last drop of flavor, but many cooks rush this step. Use a fine-mesh sieve or cheesecloth and press gently with a wooden spoon or ladle to squeeze out the remaining liquid.
I’ve seen stock that tasted weak because someone skimped on this step—don’t let that be you! The extra 1-2 minutes of pressing makes a world of difference in flavor intensity. 💧
Nutrition facts
Frequently asked questions
Why do chicken feet make stock so much richer than regular chicken broth?
Chicken feet contain high levels of collagen and gelatin, which break down during long simmering to create that signature silky, umami-rich texture. Regular chicken bones lack this gelatinous quality, resulting in a thinner, less flavorful broth. The slow cooking process transforms tough connective tissue into luxurious mouthfeel that elevates any dish.
Can I use frozen chicken feet instead of fresh?
Frozen chicken feet work perfectly—just thaw them completely before blanching. The freezing process actually helps tenderize the meat slightly. If using frozen, add an extra 30 minutes to the initial blanching time to ensure all impurities are removed. Never skip the vinegar soak, even with frozen feet.
How do I know when the stock is fully reduced?
The stock is ready when it coats the back of a spoon and has a deep amber color. For restaurant-quality results, reduce it by half over low heat—this intensifies the flavor. Test by dipping a spoon in: if the liquid clings visibly, it's perfectly reduced. Never let it boil dry; stop when you reach your desired consistency.
What are the best ways to use this stock?
This umami-packed stock shines in pho, hot pot, braised meats, and ramen. Use it as a base for soups, reduce it for sauces, or freeze in ice cube trays for convenient portions. The gelatin content makes it perfect for thickening stews naturally. For extra depth, add a splash to rice dishes or marinades.
Can I make this stock in an Instant Pot?
Yes, but with adjustments: blanching still requires stovetop, then transfer everything to the Instant Pot and cook on low pressure for 2 hours. Quick-release the pressure, then strain. The texture won't be as gelatinous as stovetop, but it's still flavorful. For best results, finish by simmering the strained stock on the stove for 30 minutes to develop depth.