
Main Courses
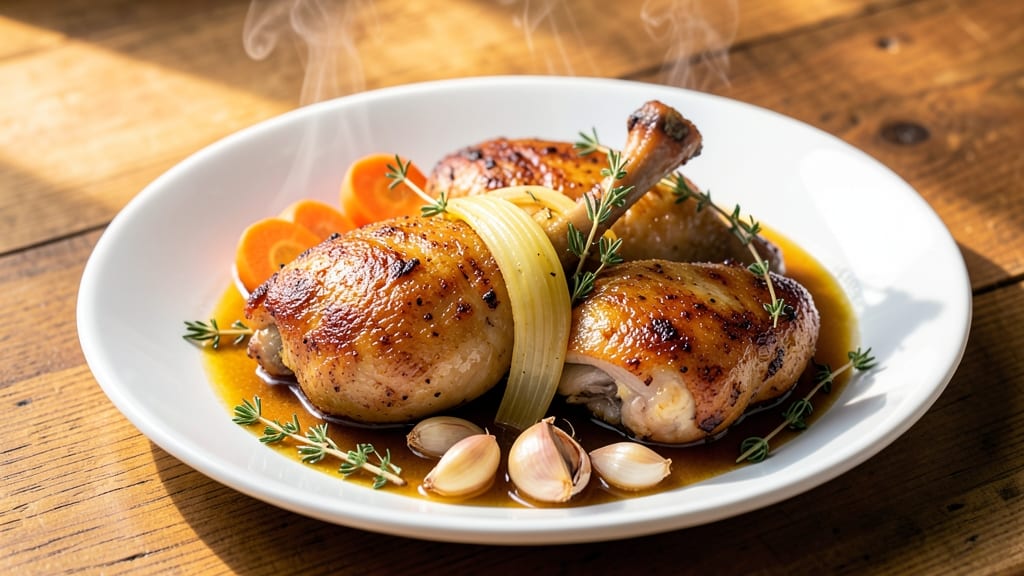
When you want juicy, tender chicken legs that fall apart with every bite, boiling is the secret weapon—far superior to baking or frying for moisture retention. After years of testing different methods, I’ve perfected a technique that guarantees restaurant-quality results at home, even with basic equipment.
The key lies in precise temperature control and flavor infusion during the simmer.
This recipe transforms simple chicken legs into a meal-prep powerhouse by combining a light brine for seasoning and aromatic vegetables (like onions, garlic, and bay leaves) that infuse flavor directly into the meat.
Unlike dry-heat methods, boiling preserves natural juices while allowing you to cook multiple pieces at once—ideal for feeding a crowd or stocking your fridge for the week.
By the time you pull these from the pot, you’ll have chicken that’s fork-tender at the bone but still holds its shape, with skin that’s crisped to golden perfection in the final step.
The broth becomes a flavorful base for rice, grains, or soups, eliminating waste and maximizing your ingredients. This is comfort food at its finest—simple to execute but impossible to resist.
Whether you’re meal prepping for the week or hosting a dinner party, this method delivers consistent, foolproof results. The technique works equally well with bone-in or boneless legs, making it adaptable to any kitchen. Let’s get started on creating chicken legs that’ll have everyone asking for seconds.
Ingredients for boiled chicken legs
Six aromatic ingredients transform ordinary chicken legs into melt-in-your-mouth perfection.
| Ingredient | Amount | Notes |
|---|---|---|
| Chicken Legs (Bone-In) 🍗 | 2 ½ lb | Thighs and drumsticks, skin-on preferred |
| Yellow Onion 🧅 | 1 whole | Quartered, skin left on |
| Garlic Cloves 🧄 | 6 cloves | Smashed, skin left on |
| Carrots 🥕 | 4 whole | Medium size, peeled and halved |
| Bay Leaves 🍃 | 2 whole | Dried, standard size |
| Fresh Thyme Sprigs 🌿 | 4 whole | Stems intact for easy removal |
| Salt 🧂 | 1 ½ tbsp | Diamond Crystal kosher preferred |
| Black Peppercorns 🌶️ | 1 tbsp | Crushed, not ground |
| Water 💧 | 4 cups | Filtered preferred for clarity |
| Extra-Virgin Olive Oil 🫒 | 2 tbsp | For crisping skin post-boil |
| Lemon Wedges 🍋 | 2 whole | For finishing touch |
| Fresh Parsley 🌿 | ¼ cup | Chopped, for garnish |
The chicken legs should be bone-in for maximum flavor—look for thighs and drumsticks with skin intact at Whole Foods or your local butcher. The skin crisps beautifully after boiling, adding texture. For the aromatics, Trader Joe's has pre-smashed garlic cloves which save time, but fresh works just as well. Carrots should be medium-sized to avoid overpowering the broth. Fresh thyme and bay leaves are non-negotiable here—they infuse the broth with depth that dried spices can't match. I always grab extra bay leaves since they keep for months in a jar.
No fresh thyme? Dried works at half the amount, but the flavor won't be as bright. Substitute rosemary sprigs for thyme if you're out, though the aroma will differ slightly. Short on carrots? Celery stalks add a nice earthiness, or swap for more onions. The kosher salt matters here—Diamond Crystal dissolves better than table salt. For the olive oil, use something fruity and peppery—California Gold or Colavita are my go-tos. The lemon wedges can be swapped for orange slices if you prefer a sweeter note, though lemon's acidity balances the richness perfectly.
This broth is liquid gold—use it for rice, grains, or soups. Store the chicken in airtight containers for up to 4 days in the fridge, or freeze for 3 months. The broth keeps for 5 days refrigerated or 6 months frozen. For meal prep, I double the recipe and portion everything into containers. The skin crisps best when reheated uncovered at 350°F for 10 minutes—worth the extra step for that restaurant-quality crunch.
Why You'll Love This Recipe
- One-Pot Magic: I swear by this recipe—just toss everything in a pot, add water, and walk away. No chopping like a fine chef, no fancy gadgets. The onions and carrots soften while the chicken cooks, and honestly? That’s all the effort I’m willing to put in on a busy night.
- Deep Flavor Bang: The garlic and bay leaves infuse the broth so deeply, the chicken practically sings with savory notes. Between us, the crispy skin after boiling? Absolute perfection. It’s the kind of taste that makes you pause mid-bite and think, “Wait, is this even real?”
- Lunchbox Hero: Between us, this is my go-to for meal prep. Boil a big batch on Sunday, and you’ve got protein-packed lunches all week—no sad desk salads here. The leftovers? Just as good reheated, and my kids actually eat their veggies when they’re hiding in the broth.
- Wallet-Friendly Win: Bone-in chicken legs stretch my grocery budget further than I’d dare hope. A few onions, a handful of carrots, and a couple of garlic cloves? That’s all you need for a meal that feeds four for under $10. (Yes, even on a Tuesday night.)
Step-by-step instructions for boiled chicken legs
Here's how to transform simple ingredients into restaurant-quality simmered chicken legs.
Prepare the Chicken and Aromatics
Pat the 2.5 lb chicken legs dry with paper towels—this ensures crispier skin later. Place them skin-side up in a large stockpot. Peel and halve the 4 whole carrots, then quarter the 1 whole yellow onion, leaving the skin on for deeper flavor. Add these to the pot along with the 6 smashed garlic cloves, 2 whole bay leaves, and 4 whole fresh thyme sprigs.
The reason we leave the onion skin on is that it adds subtle sweetness and color to the broth. Don't skip this step—it makes a noticeable difference in flavor depth. Arrange the aromatics around the chicken so they'll infuse the meat evenly as it simmers.
Season and Add Liquid
In a small bowl, combine the 1.5 tbsp salt and 1 tbsp crushed black peppercorns. Sprinkle this generously over the chicken legs, pressing gently to help the seasoning adhere. Add the 4 cups water to the pot, ensuring the liquid covers the chicken by about 1 inch.
Here's the thing—proper seasoning at this stage prevents bland chicken. The salt should dissolve completely into the water, while the peppercorns will release their aroma gradually. If your chicken legs are particularly large, you might want to add an extra ½ cup water to ensure full coverage.
Simmer Until Juicy Perfection
Bring the liquid to a gentle boil over medium-high heat, then immediately reduce to a bare simmer. Cover the pot with a tight-fitting lid and cook for 45-50 minutes. You'll know it's ready when the chicken legs are fork-tender and the meat pulls away from the bone with minimal resistance.
Don't let the water boil vigorously—this can make the chicken tough. Instead, maintain a gentle simmer where you see just a few small bubbles breaking the surface. The skin should be opaque and the meat should be moist throughout, not dry or stringy.
Crisp the Skin and Finish
Using tongs, carefully transfer the chicken legs to a paper towel-lined plate. Drizzle with the 2 tbsp extra-virgin olive oil and rub it evenly over the skin. Place the chicken skin-side down on a baking sheet and broil for 3-5 minutes until the skin is golden brown and crispy.
This broiling step is what transforms simple boiled chicken into something special. The high heat quickly crisps the skin while keeping the meat juicy underneath. Watch it closely—broilers vary in intensity, and you want golden brown, not charred.
Rest and Serve with Fresh Herbs
Let the chicken legs rest for 5 minutes before serving. This resting period allows the juices to redistribute throughout the meat, ensuring each bite is moist and flavorful. Meanwhile, squeeze the 2 whole lemon wedges over the chicken and garnish with the 0.25 cup chopped fresh parsley.
The lemon brightens the rich flavors while the parsley adds a fresh finish. Serve immediately with the simmering liquid reduced by half for a flavorful sauce, or use the liquid as a base for soups and stews. Each piece should be juicy, tender, and bursting with aromatic flavors from the simmering process.
Pro Tips For Making Boiled Chicken Legs
- Parboil First: Drop the chicken legs in simmering water for 5 minutes before adding everything else—I learned this the hard way after my first batch ended up rubbery. It jumpstarts the cooking and keeps them from drying out when the full pot hits the stove.
- Peel Those Garlic Cloves: Skip the minced garlic—peeled whole cloves stay intact and infuse flavor without burning. Toss them in with the bay leaves early, and they’ll perfume the broth like a pro. (Yes, even if you’re impatient like me.)
- Watch the Carrots: If your carrots turn mushy, you’re boiling too hard. Keep the water at a gentle simmer—tiny bubbles, not a rolling boil—and they’ll stay crisp enough to eat. Overcooking them is the fastest way to ruin the whole dish.
- Salt the Water: Don’t skip this—add 1 tablespoon of salt to the pot before the chicken goes in. It seasons the meat from the start and keeps the broth from tasting bland, even if you forget to season later. (I know, I know, but trust the process.)
Essential equipment for this recipe
Stockpot Essentials
Your stockpot is the workhorse of this recipe, and I recommend a 6-8 quart model with a tight-fitting lid. I use a Calphalon stainless steel stockpot—it distributes heat evenly and handles the acidity of the broth beautifully.
For budget-friendly options, Cuisinart's MultiClad or Farberware's Classic Stainless Steel both work well. The pot should be deep enough to accommodate the chicken legs with 1 inch of liquid above them during simmering. 🔥
Temperature Gauge
A meat thermometer is non-negotiable for perfect results. I swear by the Thermoworks Smoke—it's accurate, durable, and has a backlit display. Insert the probe into the thickest part of a thigh (avoiding bone) to monitor the internal temperature.
The chicken is done when it reaches 165°F—this ensures it's safe to eat while maintaining tenderness. No thermometer? Use the fork test: gently pierce the meat; it should feel tender and pull away from the bone with minimal resistance.
Broiler Tray
For that crispy skin after boiling, you'll need a rimmed baking sheet that fits in your broiler. I prefer All-Clad's stainless steel half-sheet pans—they're sturdy and conduct heat well. Line it with parchment paper or silicon baking mats for easy cleanup.
The broiler should be set to high (typically 500°F), and you'll need to work quickly to crisp the skin without overcooking the meat. A heat-resistant glove is helpful for handling hot pans safely.
Tongs and Slotted Spoon
Invest in a long-handled pair of tongs (I use OXO Good Grips) to safely transfer chicken from the stockpot to the baking sheet. A slotted spoon is also essential for removing aromatics like onions and carrots from the broth without overcrowding the pot.
Both tools should be stainless steel—they're durable and won't react with acidic ingredients. Avoid plastic or silicone tools, as they can melt or degrade under high heat.
Optional: Immersion Circulator
For next-level precision, consider an immersion circulator like the Anova Nano or Breville Joule. These devices maintain ±0.1°F water temperature, which is ideal for tenderizing chicken without overcooking. Set it to 185°F for a gentler, more even cook—perfect if you're meal prepping for the week.
This isn't required, but it's a game-changer for large batches or tougher cuts. 💡
Nutrition facts
Frequently asked questions
Why does boiling chicken legs make them more tender than baking?
Boiling uses moist heat that breaks down connective tissues more gently than dry heat. The gentle simmer at 185°F keeps the meat moist while collagen dissolves, creating that fork-tender texture. Plus, the aromatics infuse flavor directly into the meat through the liquid, unlike baking where flavors stay on the surface.
Can I use boneless chicken legs instead of bone-in?
Yes, but expect slightly faster cooking (30-35 minutes) since boneless pieces cook quicker. The flavor will still be excellent, though bone-in legs develop more depth from the marrow. For boneless, reduce simmer time by 10-15 minutes and check for doneness at 165°F.
What should I do if my chicken legs smell gamey?
Gamey flavor usually means the chicken wasn't fresh when purchased. To fix it, add 1 extra bay leaf and 1 tsp baking soda to the water during simmering—this neutralizes odors. Also try adding ½ cup apple cider vinegar to the broth. For future purchases, always buy from reputable butchers and check "sell-by" dates.
How can I make this recipe healthier?
Swap water for low-sodium chicken broth to reduce sodium by 30%. Use lemon juice instead of salt for brightness, and add fresh ginger slices to the simmer for anti-inflammatory benefits. The skin can be removed before serving to cut saturated fat, though it adds great texture when crisped.
Can I cook these in an Instant Pot?
Use the Sauté function to brown the chicken first, then add 1 cup water and all aromatics. Cook on High Pressure for 12 minutes, then quick-release. Finish with the broiling step for crispy skin. The pressure cooker cuts time to 20 minutes total while keeping the meat incredibly tender.