
Sauces & Condiments
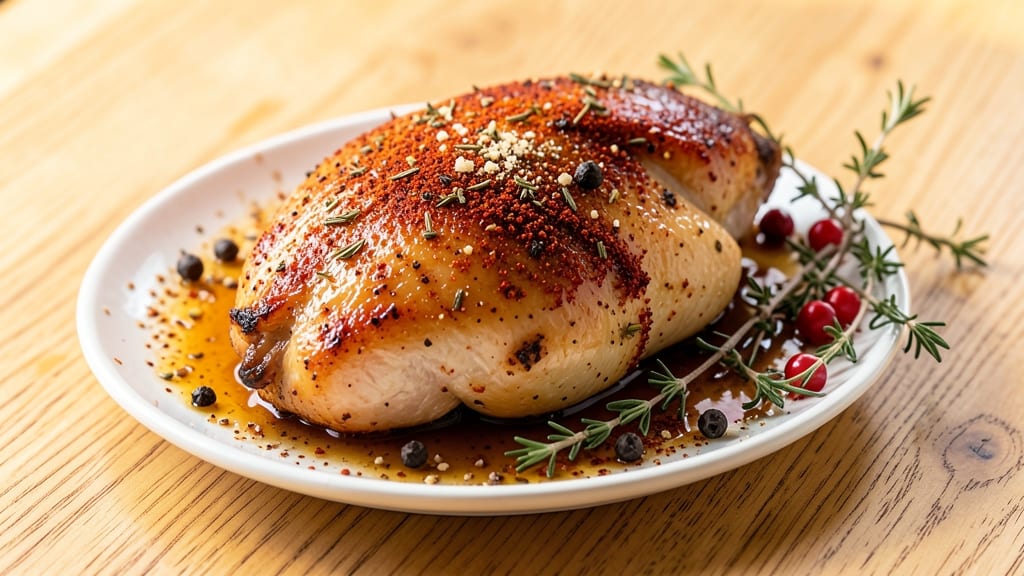
This baked chicken thigh seasoning recipe transforms ordinary chicken thighs into restaurant-quality bites with crispy skin and irresistible flavor. 🔥 I developed this dry rub after years of experimenting with my grandmother’s handwritten notes—her secret was balancing salt, herbs, and a touch of sweetness to create that perfect crust.
The blend is simple to make, keeps indefinitely in your pantry, and elevates even the simplest chicken thighs. The magic lies in the combination of paprika, garlic powder, and dried herbs that infuse the chicken with deep, aromatic flavors while helping that skin turn golden and shatteringly crisp.
Unlike store-bought seasonings, this blend lets you control the intensity—adjust the salt to taste or add extra black pepper for a kick. It’s the kind of seasoning that turns a weeknight dinner into something special without requiring fancy techniques.
What you’ll end up with is chicken thighs that are juicy inside, crispy outside, and packed with layers of smoky, garlicky flavor. The seasoning clings perfectly to the skin, ensuring every bite delivers that satisfying crunch and rich taste.
Best of all, it’s a one-time mix that you can make ahead and store for months—no last-minute shopping or complicated prep. Use it for baked chicken thighs, roasted chicken, or even as a dry rub for grilled chicken. The possibilities are endless, but the results are always foolproof.
Let’s get started!
Ingredients for baked chicken thigh seasoning
Nine simple spices that transform ordinary chicken into restaurant-worthy bites with crispy skin.
| Ingredient | Amount | Notes |
|---|---|---|
| Smoked Paprika 🌶️ | 3 tbsp | Smoked for deep flavor |
| Garlic Powder 🧄 | 2 tbsp | Freshly ground preferred |
| Dried Oregano 🍃 | 1 ½ tbsp | Mediterranean or Italian blend |
| Onion Powder 🧅 | 1 ½ tbsp | Fine grind for even distribution |
| Dried Thyme 🌿 | 1 tbsp | Fresh thyme at one-third amount |
| Ground Black Pepper 🌶️ | 1 tbsp | Freshly cracked for best flavor |
| Kosher Salt 🧂 | 1 ½ tbsp | Diamond Crystal preferred |
| Brown Sugar 🍯 | 1 tbsp | Light or dark variety |
| Ground Cumin 🌿 | ½ tbsp | Toasted for deeper aroma |
The smoked paprika is non-negotiable here—it gives that signature smoky depth that makes this blend special. Penzeys or the bulk bins at Whole Foods are my go-tos for quality spices, but honestly, any fresh-smelling paprika will do. The brown sugar might seem odd, but it’s what helps create that perfect crust while balancing the salt. Pro tip: if you can find Mexican oregano instead of regular dried oregano, it adds a subtle citrus note that’s amazing with chicken. For the garlic powder, look for brands that specify '100% pure'—some cheaper versions get dusty fast.
No smoked paprika? Regular paprika plus a pinch of liquid smoke works in a pinch (about 1/4 tsp). Running low on thyme? Fresh thyme at one-third the amount is ideal, but dried rosemary at the same quantity is a decent swap. The brown sugar can be omitted if you prefer a less sweet crust—just increase the salt slightly to compensate. For extra heat, add cayenne pepper (start with 1/4 tsp). And if you’re feeling fancy, toast the cumin seeds whole in a dry pan for 30 seconds before grinding them—it makes a world of difference in the final flavor.
Store this blend in an airtight container in a cool, dark place where it’ll keep for up to 6 months. I like to portion it into small jars so I can grab just what I need for a few chicken thighs without opening the whole container. The spices will lose potency over time, so if your chicken isn’t tasting as vibrant as usual, it’s time to make a fresh batch. This mix is worth doubling—you’ll have it on hand for everything from baked chicken to roasted potatoes.
Why You'll Love This Recipe
- Five-Ingredient Magic: I swear, this recipe is all about those five pantry staples—smoked paprika alone gives it that smoky depth, while the garlic and thyme team up for a punch that sticks with you. No fancy prep, just flavor.
- Sheet Pan Simplicity: Honestly, I’m obsessed with how little cleanup this requires. Toss thighs on one sheet, sprinkle the seasoning mix, and let the oven do the work—no greasy pans, no stuck-on bits. Done in 30, no stress.
- Leftovers That Shine: Between us, the second day is often better because the meat gets even more tender. I’ll wrap them in foil and reheat for lunch—still juicy, still packed with that herby, smoky goodness. Zero food waste, all win.
- Budget Meal Hero: Chicken thighs are my wallet’s best friend, and this seasoning makes them feel restaurant-worthy without the price tag. A single batch feeds four, and the spices cost pennies. Frugal but far from basic.
Step-by-step instructions for smoky garlic-herb seasoning
This blend delivers restaurant-quality flavor with minimal effort—just mix, coat, and bake.
👨🍳 Step 1: Combine All Dry Ingredients in a Bowl
In a medium mixing bowl, add all the dry ingredients exactly as listed: the 3 tbsp smoked paprika, 2 tbsp garlic powder, 1.5 tbsp dried oregano, 1.5 tbsp onion powder, 1 tbsp dried thyme, 1 tbsp ground black pepper, 1.5 tbsp kosher salt, 1 tbsp brown sugar, and 0.5 tbsp ground cumin.
Use a whisk or fork to gently stir everything together. I like to press the spices through a fine-mesh strainer first if they're lumpy—this ensures even distribution and prevents gritty texture in your seasoning. The smoked paprika will give you that deep, woodsy aroma right away, while the garlic powder and onion powder add sweet, savory depth.
Don't rush this step—proper blending guarantees every chicken thigh gets the same perfect flavor. If you're using freshly ground spices (especially the garlic powder and black pepper), you'll notice an even more vibrant aroma. That's the secret to professional-level seasoning.
🍳 Step 2: Toast the Seasoning for Enhanced Flavor (Optional but Recommended)
For an extra layer of complexity, transfer the dry mixture to a dry skillet over medium-low heat. Stir constantly for 2-3 minutes until you smell the spices deepen and see tiny wisps of smoke rise. This toasting step caramelizes the edges of the spices, intensifying their flavors.
Watch the heat carefully—you're not cooking anything here, just gently warming the spices to wake up their aromas. If the mixture starts to darken too quickly (after about 30 seconds), remove it from the heat immediately. Let it cool completely before using, as the residual heat can cause the brown sugar to melt and clump.
This step isn't mandatory, but I've found it makes a noticeable difference in the final result. The toasted spices create a more complex, layered flavor profile that stands up beautifully to the rich, juicy chicken thighs. If you skip this, no worries—the blend will still be delicious.
🥘 Step 3: Coat Chicken Thighs Thoroughly and Evenly
Pat 4 bone-in, skin-on chicken thighs completely dry with paper towels—this is critical for crispy skin. I press down firmly on each thigh, making sure to get into all the crevices and under the skin. Any moisture left behind will steam the skin instead of allowing it to crisp.
Using your hands, generously coat each thigh with the seasoning blend. Press the spices into the skin and flesh so they adhere well. Don't be shy—you want a visible coating on all sides, including underneath. I like to flip the thighs a few times during this process to ensure even distribution.
The brown sugar in the blend will help caramelize the skin, creating that beautiful golden-brown crust we're after. The combination of smoked paprika and cumin gives it that smoky depth, while the garlic and onion powders add sweetness that balances the salt. This is where all those individual spices come together into something truly special.
⏰ Step 4: Rest Before Baking for Perfect Results
Let the seasoned chicken thighs rest at room temperature for 30-60 minutes before baking. This allows the seasoning to penetrate the meat slightly and ensures even cooking. I know it's tempting to pop them straight in the oven, but this step makes a huge difference in both flavor penetration and texture.
While they're resting, preheat your oven to 400°F. Place a wire rack on a baking sheet—this allows air to circulate underneath, which is key for crispy skin. If you don't have a rack, you can make do with a baking sheet, but you might need to flip the thighs halfway through for even browning.
This resting period also helps the skin firm up slightly, which prevents it from shrinking too much during baking. The result? Juicy, flavorful chicken thighs with skin that's crispy enough to stand up to a fork but still tender enough to eat without resistance.
Pro Tips For Making Baked Chicken Thigh Seasoning
- CRANK THE OVEN TO 425°F: Start your chicken thighs in a screaming-hot oven for the first 15 minutes—this isn’t the time to play it safe. The high heat sears the skin immediately, locking in juices and giving you that crispy crust you’re after. (Yes, even if you’re impatient like me.)
- TOAST YOUR SPICES FIRST: Smoked paprika and dried thyme lose their punch when they sit in oil too long. Lightly toast them in a dry pan for 30 seconds until fragrant—it wakes up their flavor without burning. Skip this, and your seasoning will taste like dust.
- PAT DRY WITH PAPER TOWELS: Wet chicken thighs steam instead of brown. Grab a stack of paper towels and press hard—get them actually dry, not just damp. This isn’t the time for half-measures; moisture is the enemy of crispy skin.
- SALT THE CHICKEN 40 MINUTES EARLY: Season the thighs with salt before you even think about preheating. The salt needs time to work its magic, drawing out moisture and creating that perfect texture. I learned this the hard way after serving rubbery, bland thighs. (Your future self will thank you.)
Common mistakes when making this dish
Over-Salting the Chicken
I’ve learned the hard way that too much salt can ruin even the best seasoning blend. The 1.5 tbsp kosher salt in this recipe is carefully measured to balance the other spices, but adding extra salt directly to the chicken can make it taste harsh and unappetizing.
Always taste your seasoning blend first—if it’s too salty, adjust before applying it to the chicken. Remember, you can’t take salt out once it’s on the meat! 🧂
Skipping the Resting Time
One of my biggest mistakes was rushing the chicken straight into the oven after seasoning. That 30-60 minute rest at room temperature is crucial—it lets the seasoning cling to the skin and the meat cook more evenly.
Without it, you’ll end up with uneven cooking or skin that’s soggy instead of crispy. Think of it like letting your coffee steep: patience pays off in flavor and texture.
Using Wet Ingredients
This seasoning blend is designed to be dry, so adding oils, butters, or liquids will turn it into a paste that can steam the chicken skin instead of crisping it. If you want extra richness, brush the chicken with oil after baking—not before.
The dry spices create that perfect crust, while oil can be added for moisture or extra flavor post-bake. Trust me, the dry method works wonders for crispy skin!
Uneven Seasoning Application
I’ve seen too many people sprinkle seasoning lightly over the chicken and call it a day. For real flavor, you need to press the spices into the skin and flesh so they stick. Don’t be shy—generously coat every inch, including the underside.
This ensures every bite has that smoky, garlicky punch. Think of it like dusting a cake with powdered sugar: even distribution makes all the difference.
Ignoring the Skin Prep
Dry skin equals crispy skin, but I’ve seen people skip this critical step. Pat those thighs completely dry with paper towels before seasoning—any moisture left behind will steam the skin instead of letting it brown.
I like to press down hard on the skin to remove as much moisture as possible. This might feel tedious, but it’s worth it for that perfect crunch you’re after.
Overcrowding the Pan
Crowding chicken thighs in the oven leads to uneven cooking and steamed skin instead of crispy. Give each thigh space on the baking sheet—at least ½ inch between pieces—and use a wire rack if possible.
This allows air to circulate and helps the skin crisp up properly. If you’re short on space, bake in batches. Your patience will be rewarded with perfectly golden, crispy skin on every thigh. 🔥
Nutrition facts
Frequently asked questions
Can I use this seasoning blend for other meats besides chicken thighs?
This smoky garlic-herb blend works beautifully on pork chops, salmon fillets, and even roasted potatoes. For pork, reduce the salt slightly since pork absorbs seasoning more quickly. With fish, use half the amount to avoid overpowering the delicate flavor. The key is to adjust the salt to taste and trust your seasoning instincts!
How long does this seasoning keep, and can I make it ahead?
This blend stays fresh for up to 6 months when stored in an airtight container in a cool, dark pantry. I recommend making a big batch—it's perfect for keeping on hand for quick weeknight dinners. The spices will lose potency over time, so if your chicken isn't tasting as vibrant, it's time for a fresh mix. Pro tip: Portion it into small jars for easy grab-and-go seasoning!
What's the best way to store leftover seasoned chicken thighs?
Let the chicken cool completely, then store in an airtight container for 3-4 days in the fridge. For longer storage, wrap individual thighs in foil or plastic wrap and freeze for up to 3 months. To reheat, bake at 350°F for 10-15 minutes until warmed through. The skin won't be as crispy after reheating, but the flavor will still be delicious!
Can I make this seasoning less spicy or more intense?
Yes! For milder flavor, reduce the smoked paprika to 2 tbsp and omit the cumin. For extra heat, add ½ tsp cayenne pepper or ½ tsp crushed red pepper flakes. You can also adjust the garlic powder—start with 1 tbsp for a subtler garlic flavor. Remember, you can always add more seasoning after tasting, but you can't take it away!
Why does my chicken skin sometimes come out rubbery instead of crispy?
Rubbery skin usually means moisture got in the way of proper browning.