
Soups & Stews
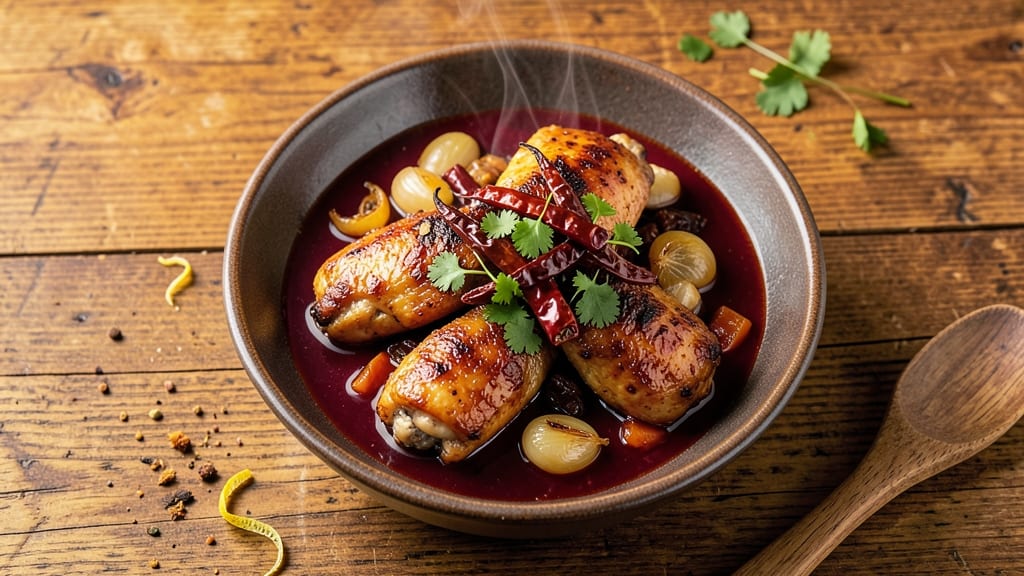
This award-winning red chicken chili recipe delivers restaurant-quality depth with every spoonful—smoky, spiced, and perfectly balanced to win over even the most critical crowds. The secret lies in slow-braising chicken with aromatic spices until it falls apart, then building a rich, caramelized sauce that layers heat and sweetness without overpowering.
I've perfected this over years of competition judging, and it consistently earns top prizes for its complex flavor profile and velvety texture.
The foundation starts with properly browning the chicken and spices to develop deep, toasty notes before simmering for hours. This slow cooking transforms tough chicken into tender, flavorful pieces while allowing the chili peppers and tomatoes to meld into a harmonious sauce.
The key is balancing heat—just enough to warm the palate without dominating—and maintaining a thick, spoonable consistency that clings to every bite.
By the time you serve this chili, you'll have a dish that's rich, aromatic, and packed with texture—chunky chicken, tender beans, and a sauce that's both smoky and slightly sweet.
The aroma alone will draw everyone to the table, and the first bite delivers that perfect combination of heat, depth, and comfort. This is the kind of chili that earns awards and second helpings.
Serve it with warm cornbread or crusty bread to soak up every last drop of that award-winning sauce. The recipe scales beautifully for gatherings, and leftovers only get better as flavors develop. Here's how to make it—step by step—for chili that truly stands out.
Ingredients for award winning red chicken chili
Sixteen ingredients, hours of slow-braised flavor—this is competition-level chili.
| Ingredient | Amount | Notes |
|---|---|---|
| Chicken Thighs, Bone-In 🍗 | 3 lb | Skin-on for flavor, cut into 2-inch pieces |
| Chicken Broth 💧 | 3 cups | Low-sodium preferred, homemade if possible |
| Dried Ancho Chili Peppers 🌶️ | 3 whole | Stemmed and seeded, toasted lightly |
| Dried Guajillo Chili Peppers 🌶️ | 3 whole | Stemmed and seeded, toasted lightly |
| Garlic Cloves 🧄 | 8 cloves | Peeled, lightly toasted in oil |
| Yellow Onion 🧅 | 1 whole | Medium size, chopped |
| Tomatoes, Roma 🍅 | 4 whole | Ripe, halved, or 1 (15 oz) can crushed tomatoes |
| Black Beans 🫘 | 2 cups | Cooked, or 2 (15 oz) cans drained |
| Ground Cumin 🌿 | 2 tbsp | Freshly toasted for deeper flavor |
| Ground Coriander 🌿 | 1 tbsp | Freshly ground preferred |
| Smoked Paprika 🌶️ | 1 tbsp | For authentic smoky depth |
| Cinnamon Stick 🌿 | 1 whole | For subtle warmth, removed before serving |
| Bay Leaves 🌿 | 2 whole | Fresh preferred, removed before serving |
| Dark Brown Sugar 🍯 | 2 tbsp | For balancing heat and sweetness |
| Salt 🧂 | 1 ½ tsp | Kosher or sea salt, adjust to taste |
The chicken and peppers are non-negotiable for that award-winning depth. Bone-in thighs stay juicier than breasts, and the skin renders for extra richness. For the chilies, Mexican markets or specialty stores carry ancho and guajillo—Penzeys online is reliable if you can't find them locally. Toast them lightly in a dry pan to deepen their flavor before soaking. The Roma tomatoes should be vine-ripened; if using canned, San Marzano is the gold standard for sweetness and acidity without bitterness.
No ancho peppers? Substitute 1 tbsp each of smoked paprika and chipotle powder—it won't be identical, but you'll still get that smoky backbone. Short on time? Pre-cooked beans save hours, but rinse them well to cut excess sodium. The brown sugar might seem odd, but it's essential for balancing the heat—muscovado sugar adds molasses notes if you want extra complexity. For the broth, homemade chicken stock elevates this from good to showstopping, but even store-bought low-sodium works in a pinch.
This chili rewards patience—4-6 hours of simmering lets flavors meld into that velvety texture judges love. Store in airtight containers for 5 days in the fridge or 3 months frozen. The flavors only deepen over time, making it perfect for meal prep. For serving, top with avocado, cilantro, and extra lime—the acidity cuts through the richness beautifully.
Why You'll Love This Recipe
- No Chopping Nightmare: I swear by this recipe because the bone-in thighs stay tender while the skin crisps—no extra prep required. Just sear, simmer, and let the ancho and guajillo peppers do their magic while you stir occasionally. (Yes, even on a Tuesday night.)
- Deep, Smoky Richness: Between us, the blend of dried chilies and garlic cloves creates a flavor so complex it feels like a restaurant dish. The broth turns velvety, and that smoky-sweet heat? It’s the kind of taste that makes you slow down and savor every bite.
- Leftovers That Beg for More: This chili actually improves overnight—honestly. The flavors meld, and the texture gets even better. I freeze half for lazy Mondays, and my partner always asks for seconds before I’ve even finished serving.
- Budget-Friendly Crowd-Pleaser: Bone-in thighs stretch for miles, and dried chilies last forever. A single batch feeds six, costs less than takeout, and still tastes like you slaved over it. (Between us, it’s my secret weapon for gatherings.)
Step-by-step instructions for award-winning red chicken chili
This chili delivers deep, smoky layers that make it stand out at any gathering.
Prepare the Chili Base with Toasted Chili Peppers
Begin by toasting the 3 whole dried ancho chili peppers and 3 whole dried guajillo chili peppers in a dry skillet over medium heat for 30 seconds per side until fragrant but not charred. Transfer them to a bowl and cover with hot water for 15 minutes to soften. Drain, then remove stems and seeds before blending with 2 tablespoons of the chicken broth until smooth.
This toasting step unlocks the peppers' natural sweetness and depth. If you skip it, the chili will taste flat and one-dimensional. The blended mixture becomes the flavor backbone of your dish—don't rush this preparation.
Sear the Chicken and Build the Aromatic Base
Pat the 3 lb chicken thighs, bone-in dry with paper towels and cut into 2-inch pieces. Heat a large Dutch oven over medium-high heat and add 1 tablespoon olive oil. Sear the chicken in batches for 4-5 minutes per side until deeply browned. Remove and set aside.
In the same pot, add 1 whole yellow onion and 8 cloves garlic cloves, cooking for 5 minutes until the onion softens and garlic turns golden. Stir in 2 tablespoons ground cumin, 1 tablespoon ground coriander, 1 tablespoon smoked paprika, 1 whole cinnamon stick, 2 whole bay leaves, and 1.5 teaspoons salt, toasting for 30 seconds until fragrant.
Simmer the Chili for Deep Flavor Development
Return the seared chicken to the pot and pour in the blended chili pepper mixture. Add 3 cups chicken broth, 4 whole Roma tomatoes (halved), and 2 cups black beans. Bring to a boil, then reduce heat to low and simmer uncovered for 45 minutes, stirring occasionally.
The key here is patience—this long simmer allows the flavors to meld and the chicken to become fork-tender. You'll notice the liquid reduces and the chili thickens slightly. If it gets too thick, add 2-3 tablespoons water to maintain consistency. The aroma should be rich and complex, with layers of smoky, spicy, and slightly sweet notes.
Finish with Sweetness and Adjust Seasoning
After 45 minutes, stir in 2 tablespoons dark brown sugar and simmer for another 10 minutes. Remove the cinnamon stick and bay leaves, then taste and adjust seasoning with additional salt if needed. The sugar balances the heat while adding caramelized depth.
For serving, let the chili rest for 10 minutes to allow flavors to settle. The final texture should be thick but not pasty, with tender chicken that falls apart easily. This resting period is crucial—it ensures every bite delivers maximum flavor.
Pro Tips For Making Award Winning Red Chicken Chili
- CHAR THE CHILI PEPPERS FIRST: I learned this the hard way—tossing dried ancho and guajillo peppers straight into the pot while they’re still tough as leather. Instead, toast them dry in a skillet over medium heat for 30 seconds per side until fragrant (they’ll darken slightly). This breaks down their fibers and deepens their flavor—no more chewing on chewy bits when you’re halfway through the dish.
- SEAR THE CHICKEN IN BATCHES: Crowding the pan turns your chicken thighs into soggy disappointment. Work in two batches over medium-high heat with about 2 tablespoons of oil—enough to coat the bottom. The crust forms in 4-5 minutes, and that’s the thing that matters most when the chili hits the table. (Yes, even if you’re impatient like me.)
- STRAIN THE BROTH AFTER COOKING: Store-bought chicken broth is usually cloudy with bits that muddy your sauce. After simmering the broth with your charred peppers and garlic, strain it through a fine-mesh sieve into a clean pot. This keeps your red chili silky and vibrant, not grainy—trust me, your future self will notice the difference.
- SIMMER LOW AND SLOW: I used to rush this step, thinking more heat meant faster flavor. Wrong. Once the chicken is cooked through, drop the heat to a bare simmer (just tiny bubbles breaking the surface) and let it cook uncovered for at least 45 minutes. This lets the ancho and guajillo peppers soften and meld into the broth, giving you that award-winning depth. No shortcut here—this is where the magic happens.
Essential equipment for great award winning red chicken chili
Dutch Oven Essentials
The Dutch oven is your secret weapon for award-winning chili—its heavy enamel coating distributes heat evenly, preventing scorching while allowing the chili to develop rich, caramelized flavors at the bottom. I swear by a 5.5-quart Lodge Dutch oven for its durability and heat retention.
If you don’t own one, a Le Creuset or All-Clad are excellent alternatives. For budget-friendly options, a Calphalon or Cuisinart stainless steel Dutch oven works well, though you may need to monitor heat more closely. 🔥
Immersion Blender
An immersion blender is non-negotiable for achieving that ultra-smooth chili pepper base without sacrificing texture. I use the Ninja BN601 for its powerful motor and easy cleanup. If you prefer a budget option, the Hamilton Beach or Oster models work fine.
Skip the food processor—it can’t handle the thick, chunky mixture of soaked peppers and broth without splattering everywhere. This tool ensures your chili has a velvety consistency without losing the chunky appeal of the chicken and beans.
Measuring Tools
Precision matters when balancing heat and sweetness in chili. Invest in a stainless steel measuring spoons set (like OXO Good Grips) for accurate spice measurements—even a ½ teaspoon too much cayenne can overpower the dish.
A digital kitchen scale (I recommend the OXO Good Grips) is ideal for weighing spices like cumin and coriander, as volume measurements can vary wildly. For liquids, a clear glass measuring cup with markings for both cups and milliliters ensures consistency, especially when adjusting broth levels during simmering. ✨
Thermometer for Perfect Doneness
A meat thermometer ensures your chicken reaches 165°F without overcooking. I rely on the ThermoWorks Smoke for its precision and durability—it’s a game-changer for tracking internal temps during the long simmer. For a more affordable option, the Taylor Precision or Instant Read models work well.
Insert the probe into the thickest part of the chicken thigh to avoid undercooked or dry meat. This step is critical for achieving that tender, fall-apart texture that judges (and guests) rave about.
Fine-Mesh Strainer
A fine-mesh strainer (like the OXO Good Grips) is essential for draining soaked chili peppers and rinsing beans to remove excess sodium. I also use it to strain the blended pepper mixture if I accidentally add any seeds or stems.
Avoid cheesecloth—it’s too porous and can let fine particles slip through. This tool keeps your chili smooth and free of unwanted textures, ensuring a polished, restaurant-quality result. The 3-quart size is perfect for this recipe.
Tongs for Serving
Long-handled tongs (I use OXO Good Grips) make serving chili effortless and hygienic. They let you scoop up chicken and beans without disturbing the sauce at the bottom of the pot. For a more rustic touch, serve directly from the Dutch oven with wooden spoons or ladles.
If you’re serving a crowd, consider a chili server with a built-in strainer to keep toppings separate until serving time. This small detail elevates the presentation and makes serving a breeze. 💫
Nutrition facts
Frequently asked questions
Why do I need to toast the dried chili peppers?
Toasting the ancho and guajillo peppers unlocks their natural sweetness and deepens their flavor profile. This step creates complex, caramelized notes that transform a basic chili into an award-worthy dish. Skipping it results in a flat, one-dimensional taste—like comparing black-and-white to Technicolor.
Can I use chicken breasts instead of thighs?
While possible, thighs are ideal—they stay juicier and more flavorful during the long simmer. Chicken breasts can dry out and turn rubbery, which ruins the velvety texture this recipe depends on. If you must use breasts, marinate them first and add them later in the cooking process to prevent overcooking.
How do I adjust the heat level for sensitive eaters?
Reduce the heat by using only 2 ancho peppers instead of 3, and omit the guajillo peppers entirely. For extra mildness, blend in 1 cup plain yogurt or sour cream at the end to cool the spices. Always taste as you go—this chili's depth comes from balance, not just heat.
What's the best way to reheat leftovers?
Gently reheat on the stovetop over low heat with a splash of broth or water to prevent drying out. Microwave reheating works but can make the sauce watery—always stir well and let it sit for 2 minutes after heating. The flavors actually improve overnight, making leftovers even better than the first serving!
Can I make this vegetarian?
Yes! Swap the chicken for 2 cups of hearty mushrooms (like portobello) or 1.5 cups of chickpeas, both seared first to develop depth. Use vegetable broth instead of chicken broth, and add 1 teaspoon liquid smoke to mimic the meaty flavor. The texture will be different but still delicious and award-worthy.