
Main Courses
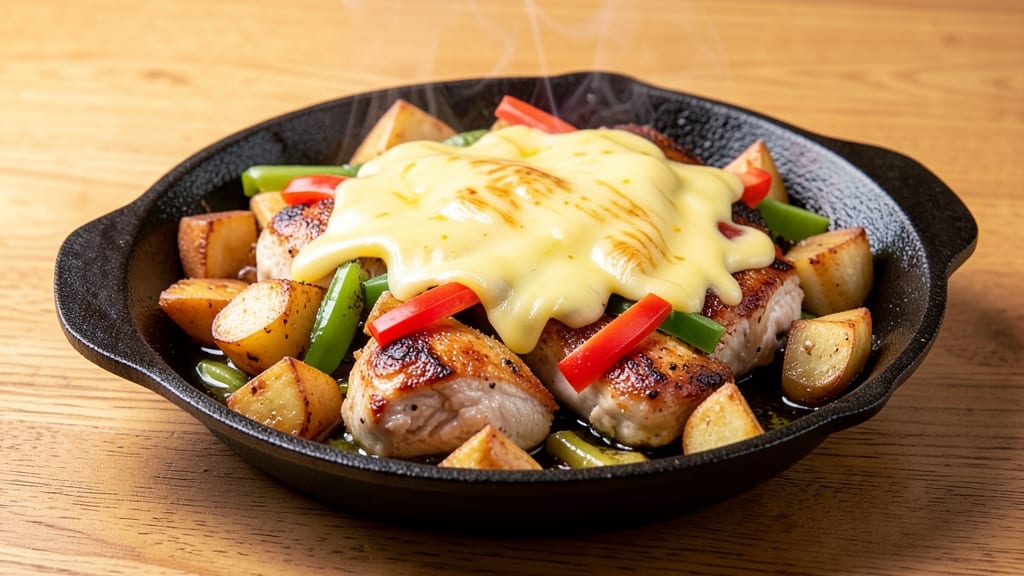
This Applebee's Sizzling Chicken Skillet recipe delivers the same restaurant-quality flavors at home—crispy tortilla crown over smoky cheddar rivers and tender chicken. After years of perfecting restaurant-style skillets, I've cracked the code for that ideal balance of textures and flavors that makes this dish so addictive.
The secret lies in browning the chicken properly and layering ingredients just right for maximum crispiness.
The foundation starts with juicy chicken thighs cooked until golden, then potatoes and vegetables that soak up all the savory juices. A blend of sharp cheddar and creamy Monterey Jack creates those signature "cheddar rivers" when melted, while a sprinkle of garlic powder and herbs adds that familiar Applebee's touch.
This isn't just a copycat—it's a better version with restaurant-quality results you can make in your own kitchen.
By the time it emerges from the oven, you'll have a skillet with perfectly crispy tortilla edges, tender chicken, and melted cheese that stretches in golden rivers.
The aroma alone will have everyone gathering around the table, and the first bite delivers that perfect combination of smoky, cheesy, and slightly spicy flavors. This is comfort food at its finest—easy to make but impossible to resist.
Serve with a side of sour cream or extra tortilla chips for scraping up every last bit of that delicious cheddar sauce. The best part? Leftovers reheat beautifully, making this an excellent meal prep option for busy weeks. Let's get cooking!
Ingredients for applebee's sizzling chicken skillet
Juicy chicken, crispy potatoes, and melty cheddar—here's how to nail that Applebee's skillet at home.
| Ingredient | Amount | Notes |
|---|---|---|
| Boneless, Skinless Chicken Thighs 🍗 | 1 ½ lb | Cut into 1-inch pieces |
| Russet Potatoes 🥔 | 2 lbs | Cut into 1-inch cubes |
| Yellow Onion 🧅 | 1 whole | Diced small |
| Red Bell Pepper 🌶️ | 1 whole | Diced small |
| Green Bell Pepper 🌶️ | 1 whole | Diced small |
| Sharp Cheddar Cheese 🧀 | 1 ½ cups | Shredded (block preferred) |
| Monterey Jack Cheese 🧀 | ½ cup | Shredded (block preferred) |
| Tortilla Chips 🍟 | 1 ½ cups | Crushed for topping |
| Garlic Powder 🧄 | 1 tbsp | For authentic flavor |
| Onion Powder 🧅 | 1 tbsp | For depth of flavor |
| Ground Black Pepper 🌶️ | ½ tsp | Freshly ground preferred |
| Salt 🧂 | 1 ½ tsp | Kosher or sea salt |
| Olive Oil 🫒 | 2 tbsp | For browning chicken |
| Sour Cream 🥛 | ¼ cup | For serving |
The chicken thighs are non-negotiable—bone-in, skin-on gives the best flavor, but boneless works too. Trader Joe's has great pre-cut thighs if you're short on time, but if you're buying whole, look for good marbling. Potatoes should be firm and starchy—Russets are ideal, but Yukon Golds add a touch of creaminess. The bell peppers? Fresh is best, but frozen works if you're in a pinch. I always grab extra tortilla chips—they're the secret to that perfect crispy crown.
No sharp chedddar? Pepper Jack works too—just add a pinch of cayenne for that smoky kick. Monterey Jack can be swapped for mild cheddar if that's what you've got. Pre-shredded cheese is fine, but grating your own makes a difference. The garlic and onion powders are what give this that restaurant-style taste—don't skip them. Need a shortcut? Pre-made taco seasoning (1 tbsp) adds a similar depth. And if your tortilla chips are stale, crisp them in the oven first—trust me on this.
This skillet reheats like a dream—350°F for 10 minutes under foil, then crisp under the broiler. Store leftovers in the fridge for 4 days or freeze for 2 months. I always double the tortilla chips and keep them in a separate container—they stay crispy that way. For meal prep, portion the cheese separately so you can add it fresh when reheating. That's when everything gets melty and magical.
Why You'll Love This Recipe
- One-Pan Magic: I swear by this recipe because it’s literally one pan, one chop, and done. The potatoes and peppers soften while the chicken sizzles—no flipping pans, no extra bowls, just that golden crust on the chicken thighs you can’t resist scraping off.
- Craving-Worthy Crunch: That crispy edge on the chicken? Chef’s kiss. The thighs stay juicy inside while the skin gets paper-thin and caramelized, and the peppers add just enough sweetness to cut through the savory sauce. Honestly, it’s the kind of dish that makes you pause mid-bite.
- Lunchbox Hero: Between us, this is my go-to for meal prep. The flavors only get better the next day—perfect for packing lunches or reheating for a quick dinner. My daughter picks out the peppers first, but still asks for seconds. (Yes, even on a Tuesday night.)
- Budget Win: Chicken thighs and potatoes stretch this dish far without breaking the bank. I’ve fed four people for under $15, and the leftovers? Just as good cold or warmed up. Not the prettiest, but the taste makes up for it every time.
Step-by-step instructions for Applebee's sizzling chicken skillet
Let's create that perfect restaurant-style skillet with crispy chicken and melted cheddar rivers.
Brown the Chicken for Maximum Flavor
Heat a large oven-safe skillet over medium-high heat and add the 2 tablespoons olive oil. Once the oil shimmers, add the 1.5 lb boneless, skinless chicken thighs cut into 1-inch pieces. Spread them out in a single layer so they don't overcrowd the pan.
Cook the chicken for 5-6 minutes on each side until golden brown and cooked through to an internal temperature of 165°F. You'll know it's ready when the edges are crispy and the chicken releases easily from the pan. Remove the chicken and set it aside on a plate - we'll add it back later.
Sauté the Vegetable Base
In the same skillet (don't wipe out those delicious browned bits), add the diced small yellow onion, red bell pepper, and green bell pepper. Cook for 5-6 minutes until the vegetables soften slightly but still retain their color. This step builds the flavor foundation for your skillet.
Sprinkle the 1 tablespoon garlic powder and 1 tablespoon onion powder over the vegetables, stirring well to coat. Cook for an additional 30 seconds until fragrant. This is where all the savory flavors meld together - don't rush this step. The vegetables should be tender but still hold their shape.
Add Potatoes and Seasonings
Add the 2 lbs russet potatoes cut into 1-inch cubes to the skillet. Sprinkle with the 1.5 teaspoons salt and 0.5 teaspoon ground black pepper, then stir gently to combine. The potatoes should be evenly distributed and coated with the seasoned vegetable mixture.
Pour in about 1 cup of water to help steam the potatoes slightly. Cover the skillet with a lid and cook for 10-12 minutes, stirring occasionally, until the potatoes are tender but not mushy. You want them to be fork-tender with a slight bite remaining - this ensures they'll crisp up nicely when we add the cheese.
Create the Cheese Rivers
Return the chicken to the skillet and stir to combine with the potatoes and vegetables. Sprinkle the 1.5 cups sharp cheddar cheese and 0.5 cup monterey jack cheese evenly over the top. The cheese should melt and create those signature rivers when we bake it.
Place the skillet in a preheated 375°F oven for 10-12 minutes until the cheese is fully melted and bubbly. Watch closely during the last 2 minutes - you want the cheese to be golden and bubbling but not burnt. The tortilla chips will crisp up perfectly during this baking time.
Top with Crushed Tortilla Chips
Remove the skillet from the oven and immediately sprinkle the 1.5 cups crushed tortilla chips evenly over the top. The chips will crisp up instantly from the residual heat in the skillet. Serve immediately with the 0.25 cup sour cream on the side for dipping.
This is the moment that matters: the crispy tortilla crown should be golden and crunchy, while the melted cheese rivers create that perfect balance of textures. Each bite delivers tender chicken, savory vegetables, and that satisfying cheesy crunch - just like your favorite restaurant version.
Pro Tips For Making Applebee'S Sizzling Chicken Skillet
- CRISP THE POTATOES FIRST: I learned this the hard way—cooking potatoes and chicken together means the potatoes turn to mush while the chicken stays dry. Par-cook the potatoes in salted water for 8-10 minutes until just tender, then drain and set aside. This keeps them fluffy and ready to soak up the skillet’s flavors without falling apart.
- CUT CHICKEN THIN AND EVEN: Uneven pieces mean some chicken gets overcooked while others stay raw. Pound the thighs to about ½-inch thickness—this ensures they cook fast enough to stay juicy but still crisp on the outside. Skip the boning knife and use a meat mallet or rolling pin instead; it’s faster and less messy.
- DON’T OVERCROWD THE PAN: I was skeptical until I tried it: giving the chicken space to sear makes all the difference. Work in batches if needed—crowding steams the chicken instead of browning it, and you’ll end up with soggy bell peppers too. A hot pan with room to breathe guarantees that golden crust everyone loves.
- UPGRADE WITH A SPLASH OF CREAM: The recipe’s butter and cheese are solid, but a tablespoon of heavy cream or half-and-half at the end adds richness without overpowering. Stir it in during the last 2 minutes of cooking—it’ll make the sauce silky and the dish feel restaurant-worthy. (Yes, even if you’re impatient like me.)
Regional styles of this applebee's sizzling chicken skillet
Texas-Style Skillet
Inspired by the bold flavors of Texas comfort food, this version swaps the classic cheddar for a blend of smoked Gouda and pepper jack, giving it that signature smoky kick.
I add 1 tbsp chipotle powder to the seasoning mix for extra depth, and top it with diced jalapeños and sour cream drizzle for a spicy-sweet contrast. The Texas twist is all about the heat and the hearty portions—perfect for feeding a crowd. 🌶️
Southwest Fusion
For a Southwest-inspired twist, I swap the potatoes for black beans and corn kernels, adding 1 tsp cumin and 1 tsp smoked paprika to the seasoning blend.
The chicken stays the same, but the cheese becomes a mix of Monterey Jack and cotija, with a final sprinkle of fresh cilantro and avocado slices. Serve with extra tortilla chips on the side for scooping up the cheesy, smoky goodness. 🌵
Cajun-Inspired Skillet
Bring the flavors of Louisiana to your skillet by adding 1 tbsp Cajun seasoning (like Tony Chachere's) to the chicken while browning. After baking, I top it with green onions and a dollop of cooling ranch dressing for balance.
The Cajun twist is all about the bold spices and the contrast of creamy and spicy—just like a perfect Cajun boil but in skillet form. 🔥
Classic Midwest Homestyle
This version keeps it simple and hearty, just like a classic Midwest family dinner. I add 1 tsp dried thyme and 1 tsp dried rosemary to the seasoning mix, and swap the Monterey Jack for extra sharp cheddar and a sprinkle of crumbled bacon on top.
The tortilla chips stay, but I serve it with a side of homemade biscuits for dipping—because nothing says comfort food like a biscuit and gravy vibe. 💛
Spicy Buffalo Chicken Skillet
For those who love heat, this version takes the skillet in a bold new direction. After browning the chicken, I toss it in ½ cup hot sauce (like Frank's RedHot) and 2 tbsp melted butter before adding it back to the skillet.
The cheese becomes a mix of blue cheese crumbles and sharp cheddar, and I finish with chopped celery and carrot sticks for crunch. Serve with extra hot sauce on the side—trust me, it’s a game-changer. 🌶️
Nutrition facts
Frequently asked questions
Can I use chicken breasts instead of thighs?
Chicken breasts work, but thighs are ideal for this skillet because they stay juicier and more flavorful when cooked slowly. If using breasts, cut them into ½-inch pieces and cook for only 3-4 minutes per side to avoid drying out. You may need to add 1-2 tablespoons of chicken broth to keep everything moist during baking.
How do I make the tortilla chips extra crispy?
For maximum crunch, crush the tortilla chips into small pieces and spread them evenly over the skillet right after baking. Place the skillet under the broiler for 1-2 minutes to crisp them up even more. Store any extra chips in an airtight container with a paper towel to keep them fresh for up to 3 days.
What if my skillet isn't oven-safe?
No problem! Transfer the skillet contents to a baking dish after adding the cheese. Use a 9x13-inch dish and bake at 375°F for 12-15 minutes, stirring once halfway through. The cheese will still melt beautifully, though the tortilla chips may not get quite as crispy. For extra crunch, broil for 1-2 minutes at the end.
Can I make this skillet ahead of time?
Assemble everything except the tortilla chips and refrigerate for up to 24 hours or freeze for 2 months. When ready to serve, bake from cold at 375°F for 20-25 minutes (covered for the first 15 minutes, then uncovered). Add the tortilla chips during the last 2 minutes of baking to crisp them up.
Why is my cheese not melting properly?
Cheese often doesn't melt well if it's too cold or the skillet isn't hot enough. Make sure your oven is fully preheated and the skillet is at room temperature before baking. For extra meltiness, sprinkle cheese in even layers and bake uncovered for the last 2 minutes to let the top brown slightly. If using pre-shredded cheese, pulse it in a food processor to break up any anti-caking agents.